

Vent covers play a crucial role in maintaining proper air circulation and ventilation within our homes. Over time, these covers may become damaged, outdated, or simply need to be replaced for aesthetic or functional reasons. Fortunately, replacement vent covers are easy to find, and the process is relatively simple and affordable. Homeowners with basic DIY skills can handle the task with ease. In this essay, we will discuss the step-by-step process of replacing vent covers to ensure efficient ventilation and enhance the overall appearance of your living space.
Step 1: Gather Necessary Tools and Materials
Before starting the vent cover installation process, gather the required tools and materials. The tools typically needed for this project include a screwdriver, measuring tape, pencil, and a level. The materials required will depend on the type of vent covers you are replacing. Common types include metal, plastic, or wooden vent covers, and the replacement vent covers should match the size and style of the old ones.
Read More: How to Understand AC Vent Odors and What Causes Them
Step 2: Measure the Existing Vent Covers
To ensure a seamless replacement, accurately measure the dimensions of the old vent cover. Use a measuring tape to measure the length and width. Most vent covers are either square or rectangular, so record the measurements accordingly. This step is crucial as it will help you find the appropriate size replacement vent covers for your space.
Step 3: Remove the Old Vent Cover
Using a screwdriver, carefully remove the screws securing the old vent cover to the wall or floor. Set the screws aside as they may be reused for the new vent cover. Gently detach the cover from the duct or opening. If you’re wondering how to remove vent cover safely, be sure to avoid damaging the surrounding wall or flooring during the process.
Step 4: Clean the Area
Once the old vent cover is removed, take the opportunity to clean the area around the vent. Remove any dust, debris, or dirt that may have accumulated. A clean surface will not only make the vent cover installation process smoother but also help maintain good air quality in your home.
Read More: What causes black mold in AC vents?
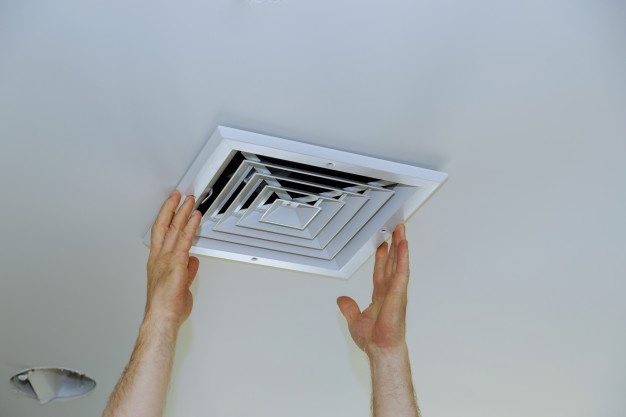
Step 5: Install the New Vent Cover
Place the new vent cover over the opening and align it properly. Ensure that the cover fits securely and snugly in place. If you’re learning how to install air vent covers, start by checking if the new cover has pre-drilled holes for screws. If not, use a pencil to mark the screw locations through the vent cover for accurate placement.
Step 6: Secure the New Vent Cover
Using the screws from the old vent cover or new ones provided, attach the replacement vent cover to the wall or floor. Make sure the screws are tightened securely but avoid over-tightening, as this may cause damage to the cover or the surrounding area. Following these steps ensures a successful vent cover installation process.
Step 7: Check for Proper Functionality
After installing the new vent cover, check for proper functionality by adjusting the airflow and observing any obstructions. Ensure that the cover opens and closes easily to control the air circulation effectively.
Conclusion
Replacing your vent covers is a straightforward process that can be completed with basic tools and materials. By following the step-by-step guide outlined in this essay, homeowners can maintain optimal air circulation and ventilation within their living spaces. Additionally, upgrading vent covers can be a simple yet effective way to enhance the aesthetics of a room. Remember to measure accurately, clean the area, and securely install the replacement vent cover to achieve the best results. With this knowledge, homeowners can easily tackle this DIY project and enjoy improved air quality and a visually appealing environment.